Typography Settings – Sitegenix.io
Steps to Change Typography Settings:
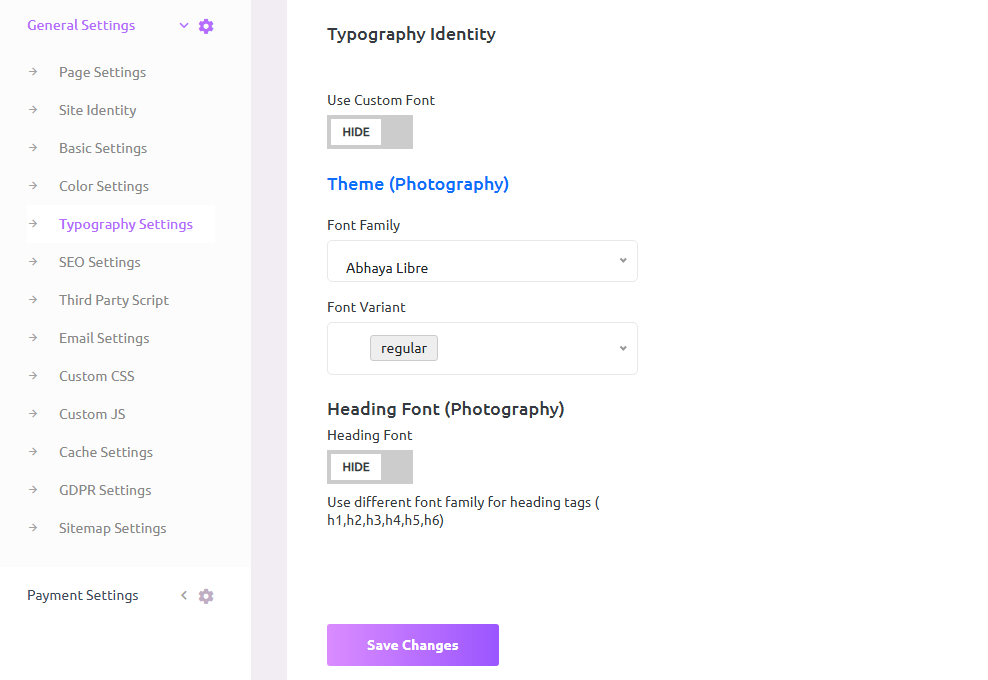
Access Typography Settings:
In the Super Admin Dashboard, navigate to the sidebar menu.
Click on "General Settings" and then select "Typography Settings".
Customize Default Fonts:
In the Typography Settings tab, users can modify several typography elements:
Font Family: Choose from a selection of inbuilt font families for headings, paragraphs, and other textual elements.
Font Variant: Select the style and weight of the font (Regular, Bold, Italics, etc.).
Font Size and Line Height: Adjust the size of the fonts to make text readable and aesthetically pleasing.
Add Custom Fonts:
If the user wants to use a custom font not available in the inbuilt list, they can enable the "Use Custom Font" button.
Click on the "Use Custom Font" option, and a field will appear to enter the font family.
Users can enter a Google Font or other custom fonts by pasting the CSS link or font URL.
This provides more flexibility and allows users to integrate brand-specific or unique typography into their website.
Save Changes:
Once the desired font settings are configured, click "Save Changes" to apply the new typography across the site.
Typography Best Practices:
- Use no more than 2-3 different font families on a single website.
- Ensure font sizes are large enough for comfortable reading (minimum 16px for body text).
- Maintain adequate line height (1.5-1.6 times the font size) for better readability.
- Consider using serif fonts for headings and sans-serif fonts for body text (or vice versa).
- Test your typography on different devices to ensure consistent appearance.