3. Creating a New Website
Once registered and logged in, users can easily create multiple websites directly from their dashboard.
Step 1: Access the Dashboard
After logging in, you'll be redirected to your user dashboard.
Step 2: Click "Create Website"
On the dashboard, locate and click the "Create Website" button.
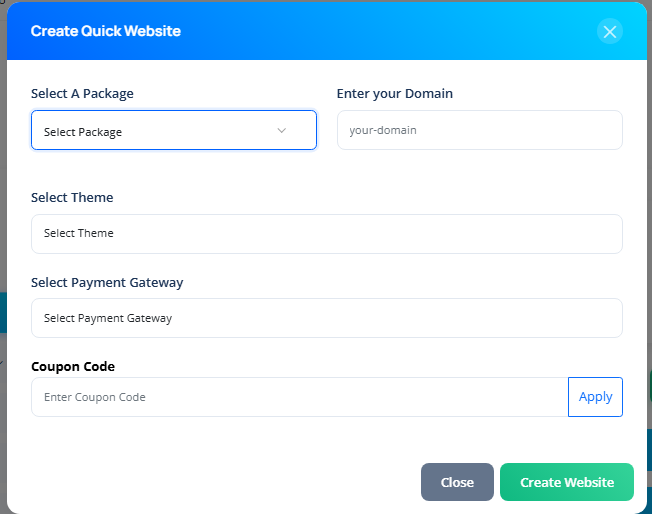
Step 3: Fill in the Website Creation Form
You'll be prompted to complete the form with the following fields:
| Field | Description |
|---|---|
| Select a Package | Choose one of the available pricing plans. |
| Domain Name | Enter the subdomain you want (e.g. yourname.sitegenix.io). |
| Select Theme | Pick a theme that matches your site purpose (e.g., Blog, Agency, E-commerce). |
| Payment Gateway | Select your preferred payment method. |
| Coupon Code | (Optional) Enter a coupon if you have one. |
| Payable Amount | Auto-calculated based on the selected package and any discounts applied. |
Step 4: Click "Create" and Complete Payment
After filling out the form, click the "Create" button.
You'll be redirected to complete the payment.
Step 5: Website Deployment
Once payment is successful:
The selected theme is automatically installed on your chosen subdomain.
For example: If you chose test.sitegenix.io and selected the Agency theme, then visiting https://test.sitegenix.io will display your live Agency site.
Tip: You can repeat this process to create additional websites from your dashboard using different subdomains and themes.